The Documents function is one of the most important functions of OVIO. Process documentation can be created from this, for example to obtain ISO certification. This documentation is created fully automatically with one click and is derived from the recorded processes. We will explain what functions and options there are in this chapter.


This chapter describes this Documents button.
1. Overview of documents
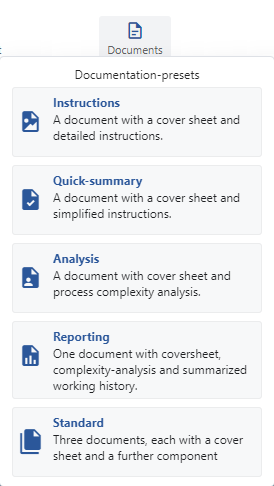
As soon as you hover the mouse pointer over the documents symbol, this view opens. There are already ready-made templates for types of documentation. By clicking on the desired template, this documentation is generated fully automatically and opens in editing mode. By clicking on the Documents button, the document generator opens and you can put together your own documentation if you like.
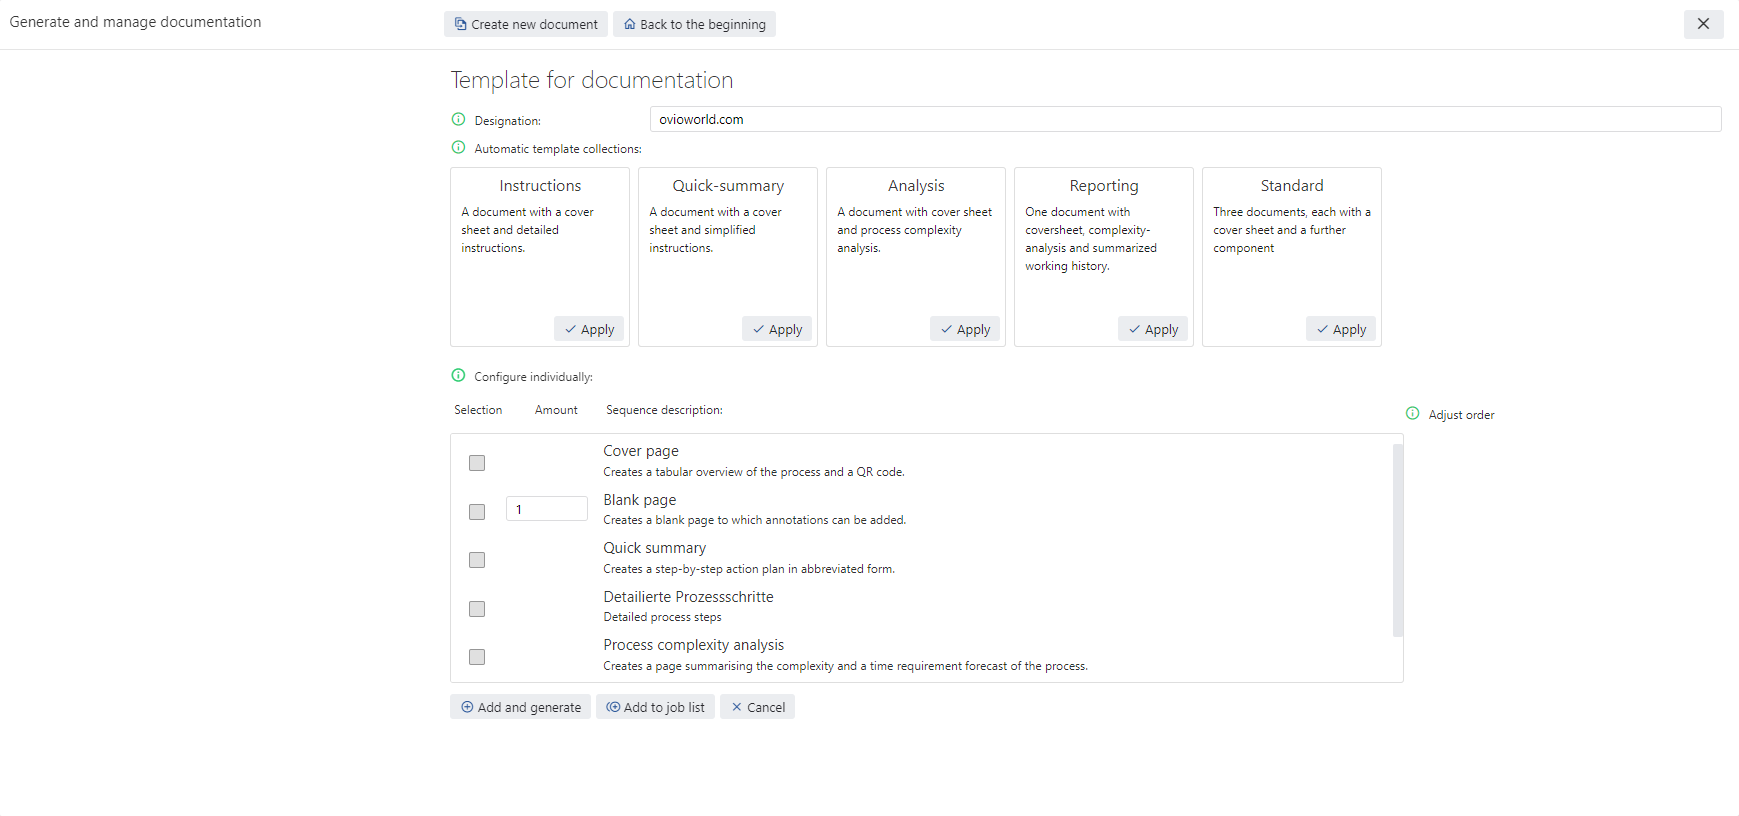
This is the view of the document generator, which we will describe in more detail in the next step.
2. Sub-Areas
2.1 Document List
The large white area on the left will only be filled once documentation has been created. All documents ever created are displayed here.
2.2 Document buttons
If you click on the “New Document” button, the window for creating documentation appears.
2.3 Documentation Templates

1.) In the template overview you can assign the document name in the first field Name.
2.) By clicking “Apply” on one of the buttons under Automatic Template Collections, this document type is created.
These templates are exactly the same as those displayed in the Documents menu:


2.4 Create custom documentation
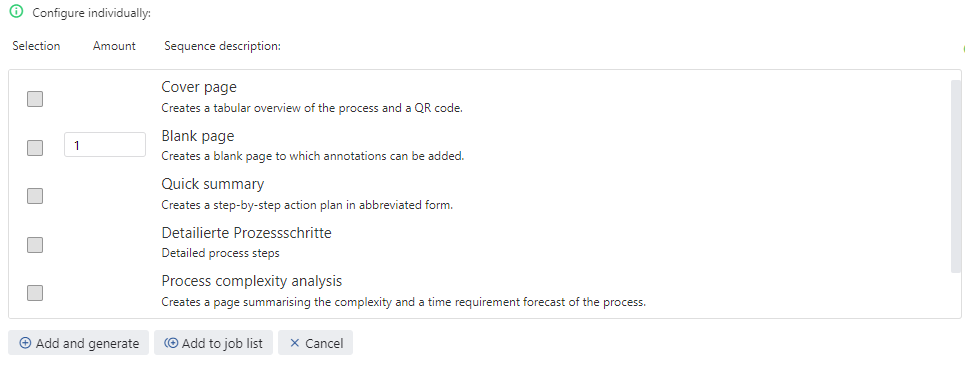
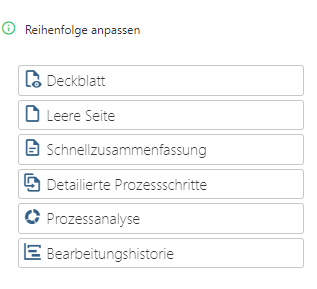
If the templates are not enough, you can put together your own under Configure individually. Here you have the option to add individual pages and then sort them under “Adjust order”.
At the bottom there are 3 buttons:
1.) Add and generate = This means that the selected pages should be processed directly and the documentation will be created immediately.
2.) Add to order list = Here you could create several documentation variants and add them to a generation queue. After adding all the desired documents to the order list, click Add and generate.
3.) Cancel = Discards everything and returns to the documentation creation start screen.
This is what the order looks like, which you can adjust using drag & drop.
2.5 Document Menu
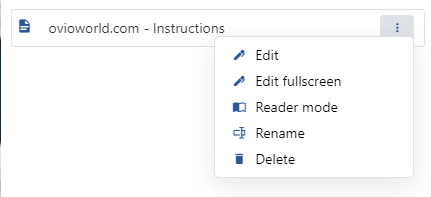
After documentation has been created, you have the opportunity to open a menu with several options:
1.) Edit = Opens the documentation in edit mode.
2.) Edit in full screen = Opens a new tab where only the documentation for editing is displayed.
3.) Open in reading mode = Open the OVIO document reading mode.
4.) Rename = The ability to change the name for the documentation.
5.) Delete = Removes the documentation; it can no longer be restored without a backup.
2.6 Document Preview & Editing
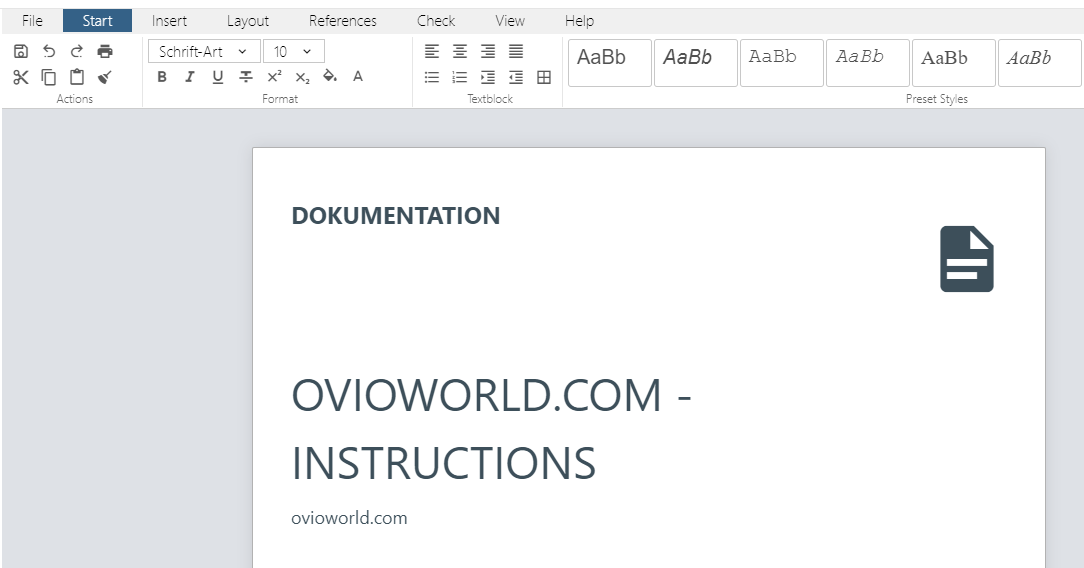
A preview of what the edit mode looks like. Here you have every opportunity to adapt this documentation the way you want, just like in Microsoft Word.
