With the insert option it is possible to additionally equip the processes with several annotations. There are two ways to do this: once before the start of a step (Intro) and once after (Outro). These are divided into several types and colors, which are explained in this chapter.


This chapter describes this Insert button.
1. Insert Overview
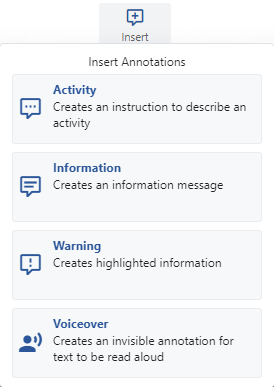
There are 3 different types of explanations and a voiceover that you can also insert.
1.1 Insert at the end or beginning

Before each insertion, you will be asked whether this annotation or voice should appear before (intro) or after (outro) the actual recorded action. These new annotations & languages are systematically counted up and then played back in that order.
2. Annotation types & colors
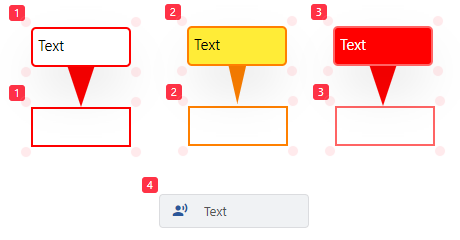
Every frame and every annotation has the ability to change size and position. This can be achieved using the red dots on the corners. The numbers on the left corners symbolize the order in which they are played.
2.1 Right click options
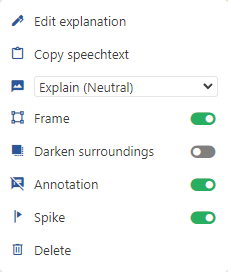
This options menu opens with a right mouse click on the border or annotation:
1.) Frame: This can be switched on or off if necessary.
2.) Dim environment: Hides the background and highlights the highlighted area.
3.) Annotation: Hides or shows the annotation bubble.
4.) Spike: Disables the spike of the annotation.
5.) Delete: Removes the annotation and moves it to the trash.
Please note that at least one of the 3 options frame, annotation or spike remains activated otherwise the annotation would no longer be accessible.
2.2 Double click on annotation
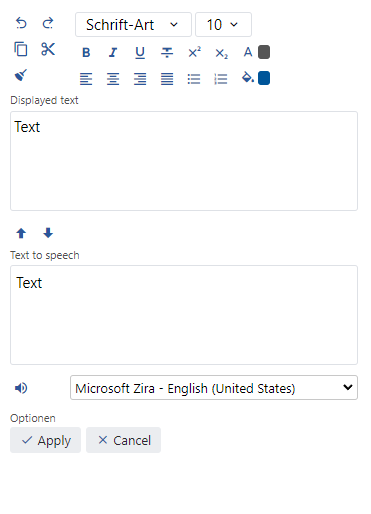
Double-clicking on the desired annotation opens the editing window. Various formatting options are available here:
1.) Formatting bar = As in any text editor (font, size, color and much more) can be changed here.
2.) Display = Displayed text in the annotation.
3.) Dubbing = spoken text to speech in a simulation.
!!! The text that is in the soundtrack is also included in the documentation. !!!
4.) Sound symbol = Here you can listen to the playback of the text in speech.
5.) Options = Done button saves the changes. Cancel button discards all changes.
2.3 Annotations in detail

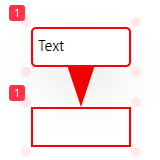
A neutral annotation is white

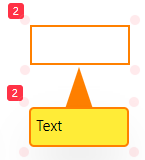
An informative annotation is yellow

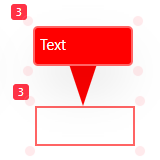
An important annotation is red


A voiceover is gray
2.4 Voice Node in detail
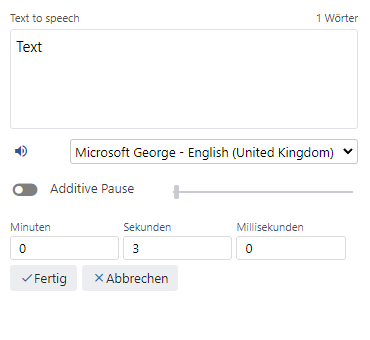
Double-clicking on the voiceover opens a separate menu for editing:
1.) Voice over = spoken text in the simulation.
2.) Sound symbol = Here you can listen to the playback of the text.
3.) Additive pause = interval in which you can introduce a waiting time
4.) Buttons = Done button saves the changes. Cancel button discards all changes.
