With the OVIO Virtual Assistant you can record any native applications or web processes. After confirmation, these processes are automatically stored and sorted in the online library. We will discuss in detail how native recording works in this chapter.
This chapter is about this Recording button
1. Requirements
There are a few steps to consider before recording natively:
1.) Screen scaling must be set to 100%. If this is not the case, the assistant will display a notification when it starts and direct you to the right place so that this setting can be made.
2.) It is recommended that the desktop icons be hidden during recording in order to avoid unwanted recordings in the processes.
3.) You should think a little bit beforehand about what the recording process might be like – this saves unnecessary failed attempts and deletion processes.
4.) Please note when recording natively you should click slowly and carefully and pay attention to the recording bar. This symbolizes when she is busy.
2. Difference between web and native recording
In the screenshot below you can see that there are some differences between a native and a web application. The OVA is smart enough to distinguish this and recommends the correct use.
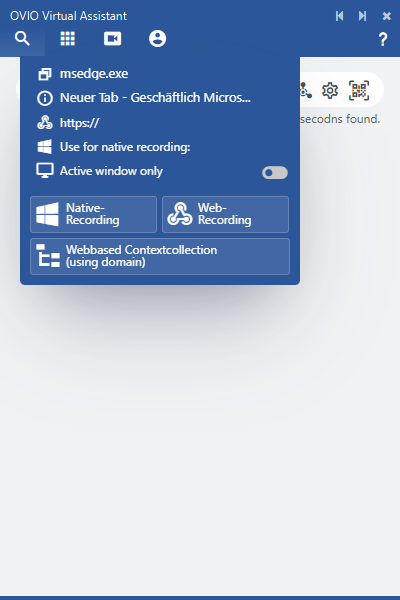
A web browser has been detected and it is suggested to start a web recording. In this case, the assistant automatically switches to the OVIO Assistant browser and starts recording. There is more about the web recording in the next chapter.
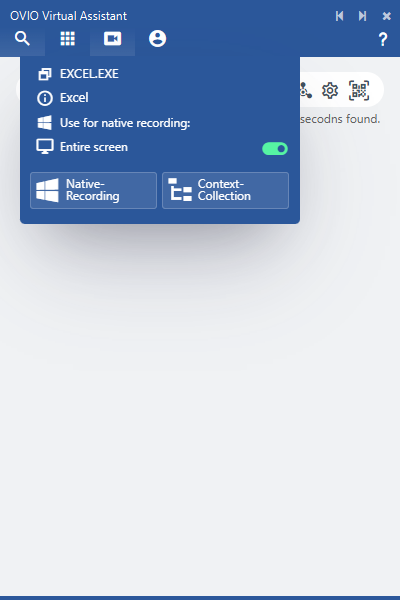
The screenshot shows a typical menu when it comes to native recording. There is an additional context capture option here that we use to combine multiple processes into one Process Flow. We will now go into this in more detail.
3. Explanation of the recording menu
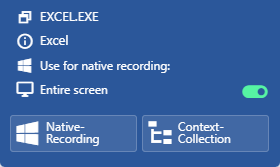
The recording menu is made up of a few options, these are as follows:
1.) The application name in the form of an extension, e.g. .exe (you will then find the process in the library under this name)
2.) Application name in this case “Excel”
3.) Only active window is not activated in this case, so the OVA will only record the selected application. This can optionally be applied to the entire screen, which means that all actions are recorded regardless of the application.
4.) By clicking on “Native recording” the assistant switches to recording mode.
4. Recording mode
First we have to fundamentally understand the status bar of the recording, here are 2 screenshots.
The yellow recording bar symbolizes that the assistant is in the waiting position. There are 3 control elements here:
1.) The gray dot starts recording.
2.) The upload symbol interrupts the active recording and uploads the previous recorded status.
3.) The cancel symbol interrupts and discards the steps recorded so far.
The green recording bar symbolizes that the assistant has started recording and from now on every click will be recorded in the target application. There are the same 3 controls here:
1.) The empty circle can be used to bring the assistant back to the waiting position (pause).
2.) The upload symbol stops the active recording and uploads the content.
3.) The Cancel symbol interrupts and discards all steps that have been recorded so far.
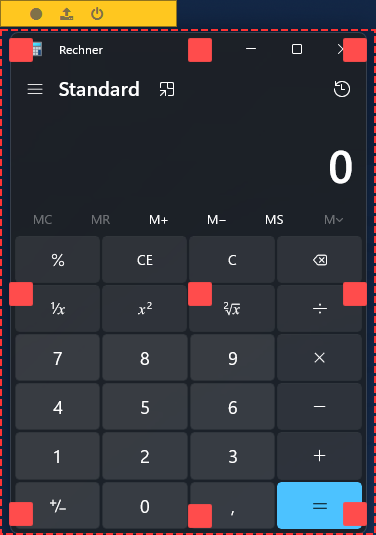
OVA in the waiting position here you can move the recording window with the red boxes to a disired size.
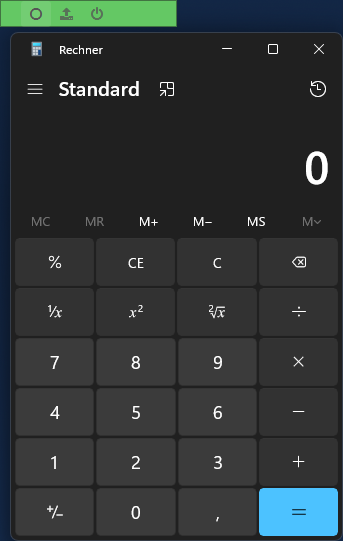
OVA in recording mode, every entry madein the application is now recorded.
It is also important to say that the assistant only starts recording as soon as an action takes place. It’s not a classic video, but action-related interactions trigger the screenshot and the interface information is read. This means you can take as much time as you like and think about which step you want to take next.

After the upload symbol has been clicked, this dialog appears. At this moment the author has another opportunity to discard the recording by clicking Cancel here. By clicking on Upload, this recording is uploaded to the cloud and the EPSS starts in the metadata view.
